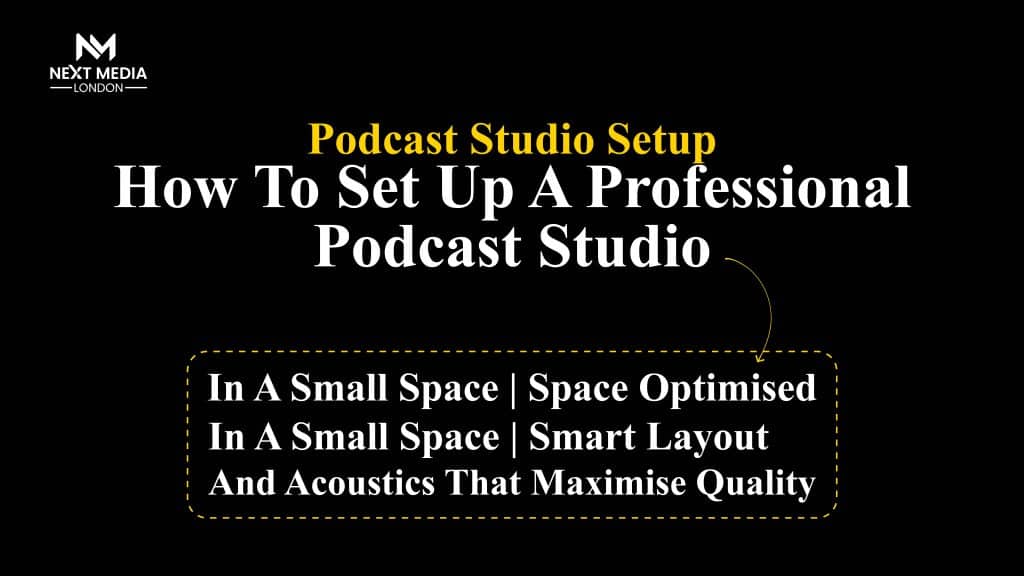
Setting up a professional podcast studio in a small space is one of the most common challenges I hear from UK creators who are just getting started. The assumption is that you need a large room, expensive gear, or a commercial facility to sound professional.
I used to think the same thing. What I discovered after months of testing different setups is that room size has almost nothing to do with audio quality. What actually matters is how you treat the environment you already have.
Whether it’s a bedroom corner in East London, a converted cupboard in a home office, or a spare room above a busy street, a well-optimised small space can produce broadcast-quality audio. This guide covers exactly how to do that, step by step.
For a complete walkthrough on equipment, acoustic treatment, and professional recording setups, read our London Podcast Studio Setup Guide (2026).
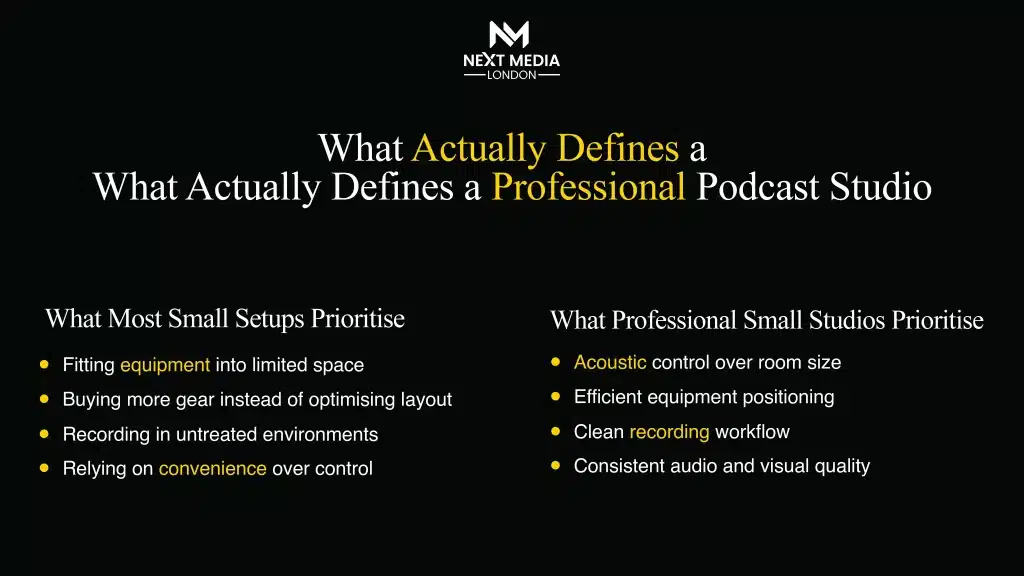
Why Small Rooms Work Against You (And How to Fix It)
The first time I recorded in an untreated room, the audio sounded hollow and distant. Every reflection was audible. I could hear the hum of my laptop fan and a low resonance that made my voice sound thin and distant.
My first instinct was to buy a better microphone. That did not help at all because the microphone was not the problem. The room was.
Hard walls, bare floors, and empty corners create reflections and low-frequency build-up that no equipment can correct. Here is what specifically goes wrong in an untreated space:
- Sound waves bounce off hard surfaces and arrive at the microphone as an echo
- Corners trap low frequencies, creating a muddy, uneven sound
- External noise enters easily with no acoustic buffer to absorb it
- The recording sounds like a room, not like a studio
Once I understood that the room was the source of the problem, I stopped looking at equipment upgrades and started treating the environment as the foundation of everything else.
Start With Acoustic Treatment, Not Equipment
Acoustic treatment works by absorbing sound before it has a chance to reflect and cause problems. I started with the simplest and cheapest changes first, and the improvement was immediate.
- Thick curtains over windows to kill glass reflections
- A rug on bare flooring to absorb floor bounce
- Bookshelves filled with books along the back wall, these scatter and diffuse sound naturally
- Acoustic foam panels at the first reflection points on the side walls
- Bass traps in the corners to control low-frequency build-up
These five changes alone reduced the echo in my room more than any microphone upgrade I have made since. The total cost was under £150.
One important distinction: acoustic treatment improves how sound behaves inside the room. Soundproofing prevents external noise from entering. They solve different problems. Most small home studios in London need both, but acoustic treatment always comes first.
The Best Microphone Setup for a Small Room
Once the room is treated, microphone selection becomes meaningful. For small spaces, I always recommend a dynamic cardioid microphone over a condenser. Dynamic microphones are less sensitive and reject background noise, room reflections, and fan hum far more effectively.
The setup I use is straightforward:
- A dynamic cardioid microphone positioned four to six inches from the mouth
- Slightly off-axis angle to reduce plosive sounds from P and B sounds
- Boom arm to keep the microphone stable and reduce desk vibration
- An audio interface connecting the microphone to the recording software
The cardioid polar pattern captures sound from directly in front while rejecting sound from the sides and rear. In a small room, this lets the microphone’s own design handle part of the acoustic work, so less echo reaches the capsule before any processing is applied.
Reducing Background Noise Before You Hit Record
Noise control starts before you press record, not after. I developed a short pre-recording routine that eliminates most background noise issues before they reach the edit.
- Close all windows and doors before starting
- Turn off fans, air conditioners, and unnecessary electronics
- Put your phone on silent and out of reach
- Let the room settle for thirty seconds, then run a test recording
- Listen back on headphones and resolve anything you can hear
This routine takes under two minutes and consistently produces a cleaner noise floor than any noise reduction plugin I have tested. The goal is always to fix the problem at the source, not in post-production.
Keeping the microphone close to your mouth is equally important. The closer the microphone, the stronger your voice signal is relative to the background noise. This improves the signal-to-noise ratio, which means less noise in the recording and less work in editing.
Professional Audio Standards to Aim For
Matching professional benchmarks is not complicated once you know the targets. These are the settings I use for every recording session, regardless of whether I’m in a home setup or a professional studio.
| Parameter | Professional Standard | Small Studio Target |
| Sample Rate | 48 kHz | 44.1–48 kHz |
| Bit Depth | 24-bit | 16–24 bit |
| Loudness (LUFS) | -16 LUFS | -14 to -18 LUFS |
| Noise Floor | Below -60 dB | Below -55 dB |
| Peak Level | -1 dB | -1 to -3 dB |
Recording at 48 kHz and 24-bit depth gives you enough resolution to edit cleanly without audio degradation. Targeting -16 LUFS ensures your episodes sound consistent across all major podcast platforms, Spotify, Apple Podcasts, and YouTube, without jarring volume differences between episodes.
Home Studio vs. Professional Studio: What Actually Fits Your Situation
I have used both extensively, and the honest answer is that each setup serves a different purpose. Neither is always the right answer.
A well-treated home studio is ideal for:
- Consistent, long-form content production published on a regular schedule
- Solo podcasters on a budget who have time to optimise the setup gradually
- Creators who need full schedule flexibility
- Formats that do not require a strong visual production (audio-only podcasting)
A professional studio is the better choice when:
- You are launching a brand or corporate podcast series, and first impressions matter
- You need video production quality alongside audio cameras, lighting, and multiple angles
- You are bringing in a guest and need a space that looks and sounds credible
- You want guaranteed results without spending months optimising a home setup
This is where Next Media London becomes a genuinely useful option for creators and businesses in London. Their studio in Bermondsey, inside the Biscuit Factory complex at Cocoa Studios, is set up specifically for professional podcast and video content production.
Rather than spending weeks building and troubleshooting a home setup, you walk into a space with engineered acoustics, professional lighting, and broadcast-quality equipment already in place. For businesses using podcasting as a brand authority or lead generation tool, the production quality of those first few episodes is often the deciding factor in whether listeners stay.
If you want help setting up a professional podcast studio or booking a ready recording space, you can contact Next Media London podcast studio via DM for quick assistance.
Common Mistakes That Damage Audio Quality
Almost every audio quality problem I have diagnosed in other people’s recordings comes down to the same handful of mistakes. They are all fixable once you know what to look for.
- Recording too far from the microphone, the further away, the more room noise you pick up relative to your voice. Move closer.
- Over-applying noise reduction in post-aggressive processing makes audio sound artificial and processed. Fix the room, not the file.
- Poor gain staging recording too quietly forces you to boost in editing, which amplifies noise. Recording too loud causes clipping that cannot be repaired.
- Ignoring acoustic treatment entirely, no microphone upgrade compensates for an untreated room. The environment always comes first.
- Inconsistent recording conditions, changing your setup between sessions, create audio inconsistencies across episodes.
For creators who want a professional, ready-to-record environment without setup hassle, Next Media London podcast studio booking is available. Just DM to reserve your session.
Building and Scaling Your Studio Over Time
A home studio does not need to be perfect from day one. My approach has always been to start with the essentials and upgrade based on what the content actually needs, not based on what looks impressive on a gear list.
Start with this foundation:
- Dynamic microphone
- Basic audio interface
- Closed-back headphones for monitoring
- Basic acoustic treatment panels
- Simple recording software (Audacity is free and sufficient to start)
The biggest returns come from treating the room first, getting microphone placement right, and developing a consistent pre-recording routine. These cost relatively little but have an outsized impact on the finished product.
As the content grows, so can the studio video production, multi-microphone guest setups, dedicated lighting, and remote recording integrations all become natural additions to a system that is already built on solid fundamentals.
For creators who want professional-quality output right now, without the time investment of building and refining a home studio from scratch, booking time in a professional facility removes all of those variables in one step.
Conclusion
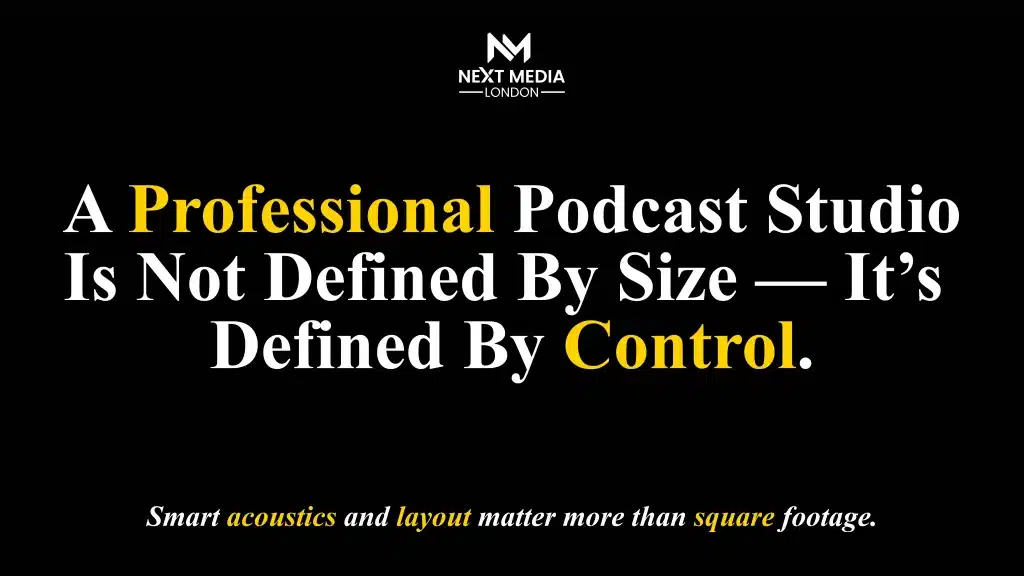
After everything I have learned building and using podcast studios across different environments, the conclusion is always the same: the environment is the foundation, not the equipment.
A small, well-treated room with a dynamic microphone and proper gain staging will outperform a large, untreated room with professional-grade gear every single time. Start by controlling the room. Position the microphone correctly. Record at the right settings. And if the content demands production quality beyond what your current home setup can deliver, a professional facility removes those barriers immediately.
The best studio is the one that produces consistent, clean, professional audio regardless of how large the room is or how much the gear costs.
If you’re ready to start recording professionally without setup delays, you can book Next Media London podcast studio anytime through DM.
Frequently Asked Questions (FAQS)
Kia ek chotay aur untreated kamray mein podcasting ke liye condenser mic istemal karna sahi hai?
Nahi, chotay kamron mein condenser mic kamray ki goonj (echo) aur har tarah ka background shor bohat zyada pakarta hai. Professional result ke liye dynamic cardioid
Sastay tareeqay se kamray ki acoustics ko kaisay behtar banaya ja sakta hai?
Aap deewaron par motay parday (heavy curtains) laga kar, farsh par rug bicha kar, aur kamray ko kitabon ya soft furniture se bhar kar echo ko kafi had tak khatam kar saktay hain. Kapron se bhari hui almari (closet) bhi recording ke liye behtareen jagah hai.
Professional podcasting ke liye audio levels (LUFS) kia honay chahiay?
Industry standard ke mutabiq aapki final file -16 LUFS (stereo) par honi chahiay. Is se aapka podcast har platform (Spotify, Apple) par ek jaisa sunayi dega aur listeners ko volume kam-zyada nahi karna paray ga.
Mic placement ka professional audio mein kia kirdar hai?
Mic ko apne mun se takreeban 4 se 6 inch ki doori par rakhna chahiay. Is se aapki awaz wazay (clear) hogi aur background noise kam se kam record hogi, jo professional sound ke liye lazmi hai.
Kia professional studio rent par lena home studio bananay se behtar hai?
Agar aapko video podcast banani hai ya kisi baray guest ka interview karna hai, to professional studio behtar hai kyunke wahan acoustic treatment aur 4K cameras pehlay se maujood hotay hain.
Recording se pehlay background noise ko kaisay control karein?
Fans, air conditioners, aur laptops ke fans ko band kar dein. Khidkiyan aur darwazay achi tarah band karein aur mobile ko silent par rakhein taake koi electromagnetic interference na ho.